The steps I took to make my pinhole camera:
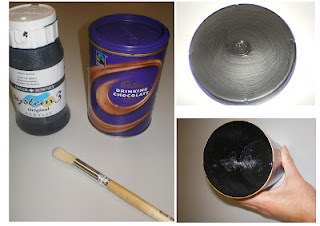
Step 1. First I took a tub and painted it (aswell as the lid) with black paint.
Step 2. Secondly, I carved a 2cm by 2cm squared hole 6cm up from the base of the tub.
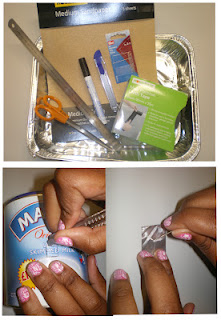

Step 3. I then cut out a squared piece of tin foil, larger than the hole on the
side of the tub. Once I had my foil cut out I rubbed sand paper against
one side of it and then coloured the same side in with a black marker
pen and used a pin to create a very small hole in the middle of it.
Step 4. After that I stuck it down covering the squared hole on the tub. However I ensured that the 'pinhole' was still visible.
 Step 5. Once that was all done, I made a flap out of black electric tape to
cover the pinhole for the times that I don't want light to enter the
tub. (Particularly when I've finished exposing the photo paper to light).
Step 5. Once that was all done, I made a flap out of black electric tape to
cover the pinhole for the times that I don't want light to enter the
tub. (Particularly when I've finished exposing the photo paper to light).
Why did I use black ink and a black marker pen?
I
had to use black paint and a black marker pen as the darkness of the
colour ensures that no extra light is entering the tub. If 'extra' light
was to enter the container, I would not get a good quality picture as
the light would reflect onto the paper and create black marks where not
needed.
Why use a pin to make the hole?
The
pin was used specifically because it creates a small appeture for the
camera, which allows the image to come out as sharp as possible.
No comments:
Post a Comment